**DirectX Raytracing, Tutorial 2**
**Adding a basic full-screen rasterization pass**
As [discussed in our tutorial introduction](../../dxr_tutors.md.html), our goal is to provide
a simple infrastructure for getting a DirectX Raytracing application up and running without
digging around in low-level API specification documents. Tutorial 2 continues with our sequence
covering some infrastructure basics before we get to the meat of implementing a path tracer.
If you wish to move on to a tutorial with actual DirectX Raytracing programming,
[jump ahead to Tutorial 4](../Tutor4/tutorial04.md.html).
Adding a More Complex RenderPass
===============================================================================
[Tutorial 1](../Tutor1/tutorial01.md.html) showed you how to get a basic window open
and inset a simplistic *`RenderPass`* to clear your screen to a user-controllable color. This
tutorial shows how to setup and use a more complex rasterization pass with a programmable HLSL
shader.
The specific shader is not particularly important, rather the point of this tutorial is to demonstrate
the wrappers we have for encapsulating programmable shaders of various kinds and how you interact
and pass parameters to these shaders from your C++ based *`RenderPasses`*.
If you open up *`Tutor02-SimpleRasterShader.cpp`*, you will find it looks remarkably similar to
the main program from Tutorial 1. The key difference is in what *`RenderPass`* we add to our pipeline:
~~~~~~~~~~~~~~~~~~~~ C
// Create our rendering pipeline
RenderingPipeline *pipeline = new RenderingPipeline();
pipeline->setPass(0, SinusoidRasterPass::create());
~~~~~~~~~~~~~~~~~~~~
In this tutorial, we simply swap out the *`ConstantColorPass`* for our more complex *`SinusoidRasterPass`*.
The key files to look at are then:
* *`Passes\SinusoidRasterPass.h`*
* *`Passes\SinusoidRasterPass.cpp`*
* *`Data\Tutorial02\sinusoid.ps.hlsl`*
Looking at the *`SinusoidRasterPass.h`* header, you will largely see the same class declaration
boilerplate from the *`ConstantColorPass`*, and in fact the only differences are in the member variables:
~~~~~~~~~~~~~~~~~~~~ C
FullscreenLaunch::SharedPtr mpSinusoidPass;
GraphicsState::SharedPtr mpGfxState;
uint32_t mFrameCount = 0;
float mScaleValue = 0.1f;
~~~~~~~~~~~~~~~~~~~~
For now ignore *`mFrameCount`* and *`mScaleValue`*, which are parameters to control the image displayed
by our shader.
The *`GraphicsState`* is a Falcor class that wraps up the pipeline state of a DirectX rasterization pipeline.
This includes things like culling, depth testing, blending, rasterization parameters, etc. For our
ray tracing tutorials, we only need a simple _default_ graphics state, so the key to remember is we need _some_ graphics state
to setup a DirectX pipeline. Don't worry too much about what settings it controls.
The *`FullscreenLaunch`* class is an abstraction in the *`SharedUtils\`* directory that easily allows you
to launch very simple full-screen rasterization draw calls. Similar abstractions, *`RasterLaunch`* and *`RayLaunch`*,
exist for drawing more complex raster and ray calls using loaded scene geometry. We'll use those in future
tutorials, and they behave quite similar to our *`FullscreenLaunch`*.
Defining the SinusoidRasterPass
===============================================================================
As in the case of our simpler *`ConstantColorPass`*, we need to define the *`initialize`*, *`renderGui`*,
and *`execute`* methods. Looking in *`SinusoidRasterPass.cpp`*, the *`renderGui`* should be self explanatory:
~~~~~~~~~~~~~~~C
pGui->addFloatVar()"Sin multiplier", mScaleValue, 0.0f, 1.0f, 0.00001f);
~~~~~~~~~~~~~~~
It simply adds a GUI widget that allows control over a single floating point value, allowing
variations in the range [0...1] in increments of 0.00001.
Our *`initialize`* pass adds two new lines that were not part of *`ConstantColorPass`*:
~~~~~~~~~~~~~~~C
mpGfxState = GraphicsState::create();
mpSinusoidPass = FullscreenLaunch::create( "Tutorial02\\sinusoid.ps.hlsl" );
~~~~~~~~~~~~~~~
The first creates a default DirectX raster pipeline state we'll use when rendering. The
second line says we'll be doing a full-screen draw call using the specified HLSL shader.
Falcor's full-screen pass uses a default vertex shader, so you only need to specify a pixel shader.
The *`execute`* method is more complex, so let's step through the entire function:
~~~~~~~~~~~~~~~~~~C
void SinusoidRasterPass::execute(RenderContext::SharedPtr pRenderContext)
{
// Create a framebuffer object to render into.
Fbo::SharedPtr outputFbo =
mpResManager->createManagedFbo({ ResourceManager::kOutputChannel });
mpGfxState->setFbo(outputFbo);
// Set shader parameters for our shader
auto shaderVars = mpSinusoidPass->getVars();
shaderVars["PerFrameCB"]["gFrameCount"] = mFrameCount++;
shaderVars["PerFrameCB"]["gMultValue"] = mScaleValue;
// Execute our shader
mpSinusoidPass->execute(pRenderContext, mpGfxState);
}
~~~~~~~~~~~~~~~~~~
In this case, we're executing a raster shader. This means we need a framebuffer to draw into, and
we can't simply clear our texture (as we did in *`ConstantColorPass`*).
Our first line asks our *`ResourceManager`* to create a framebuffer for us, and to bind the *`kOutputChannel`*
as the framebuffer object's color channel. Ideally, you would not create a new framebuffer each frame, but
this is left as an exercise for more advanced readers. We then update our DirectX pipeline state to send results to this
new FBO when we run our shader.
The next three lines set shader parameters in the *`sinusoid.ps.hlsl`* shader. The first line gets an object
that can access and transfer data to the variables in your shader. The next two lines have very simple syntax: on the left
of the assignment operator you specify the variable in your shader, on the right is the value
you want to transfer to HLSL. The assignment operator is overloaded and (in a Debug build)
will do some basic type checking (at runtime) to ensure the value is the right type to assign to the
specified HLSL variable.
The syntax *`shaderVars["PerFrameCB"]["gMultValue"] = mScaleValue`* reads as: in the specified shader,
find the variable *`gMultValue`* in the constant buffer *`PerFrameCB`* and set the value to *`mScaleValue`*. This is
a very simple and clear assignment between CPU and GPU variables. It is not the most efficient way to update
shader values, but for the purposes of these tutorials (and most of my research prototypes), this overhead is
not significant enough to favor more efficient, but cryptic, data transfers.
Finally, we execute our full-screen shader. This requires two parameters: the current DirectX render context and the
graphics state to use for rendering.
Interacting with the Sinusoidal HLSL Shader
===============================================================================
The final step to understanding this tutorial is to look at our GPU shader in *`sinusoid.ps.hlsl`*:
~~~~~~~~~~~~~~~~~~~~ C
// A constant buffer of shader parameters populated from our C++ code
cbuffer PerFrameCB
{
uint gFrameCount;
float gMultValue;
}
float4 main(float2 texC : TEXCOORD, float4 pos : SV_Position) : SV_Target0
{
// Get integer screen coordinates (e.g., in [0..1920] x [0..1080])
uint2 pixelPos = (uint2)pos.xy;
// Compute a per-pixel sinusoidal value
float sinusoid = 0.5 * (1.0f + sin( 0.001f * gMultValue *
dot(pixelPos, pixelPos) +
gFrameCount ));
// Save our color out to our framebuffer
return float4(sinusoid, sinusoid, sinusoid, 1.0f);
}
~~~~~~~~~~~~~~~~~~~~
The first couple lines define our constant buffer with the parameters we set from the
*`execute`* method of our *`SinusoidRenderPass`*.
We then define our shader *`main`* that takes two variables (*`texC`* and *`pos`*) from
Falcor's default vertex shader and writes out to our framebuffer's color buffer 0 (i.e., *`SV_Target0`*).
The math is fairly unimportant, but generates a grayscale sinuosoid that slowly changes over
time (since *`gFrameCount`* gets incremented each frame) and whose scale is controllable by the
*`gMultValue`* variable.
What Does it Look Like?
===============================================================================
That covers the important points of this tutorial. Now if you run it, you get a result similar to this:
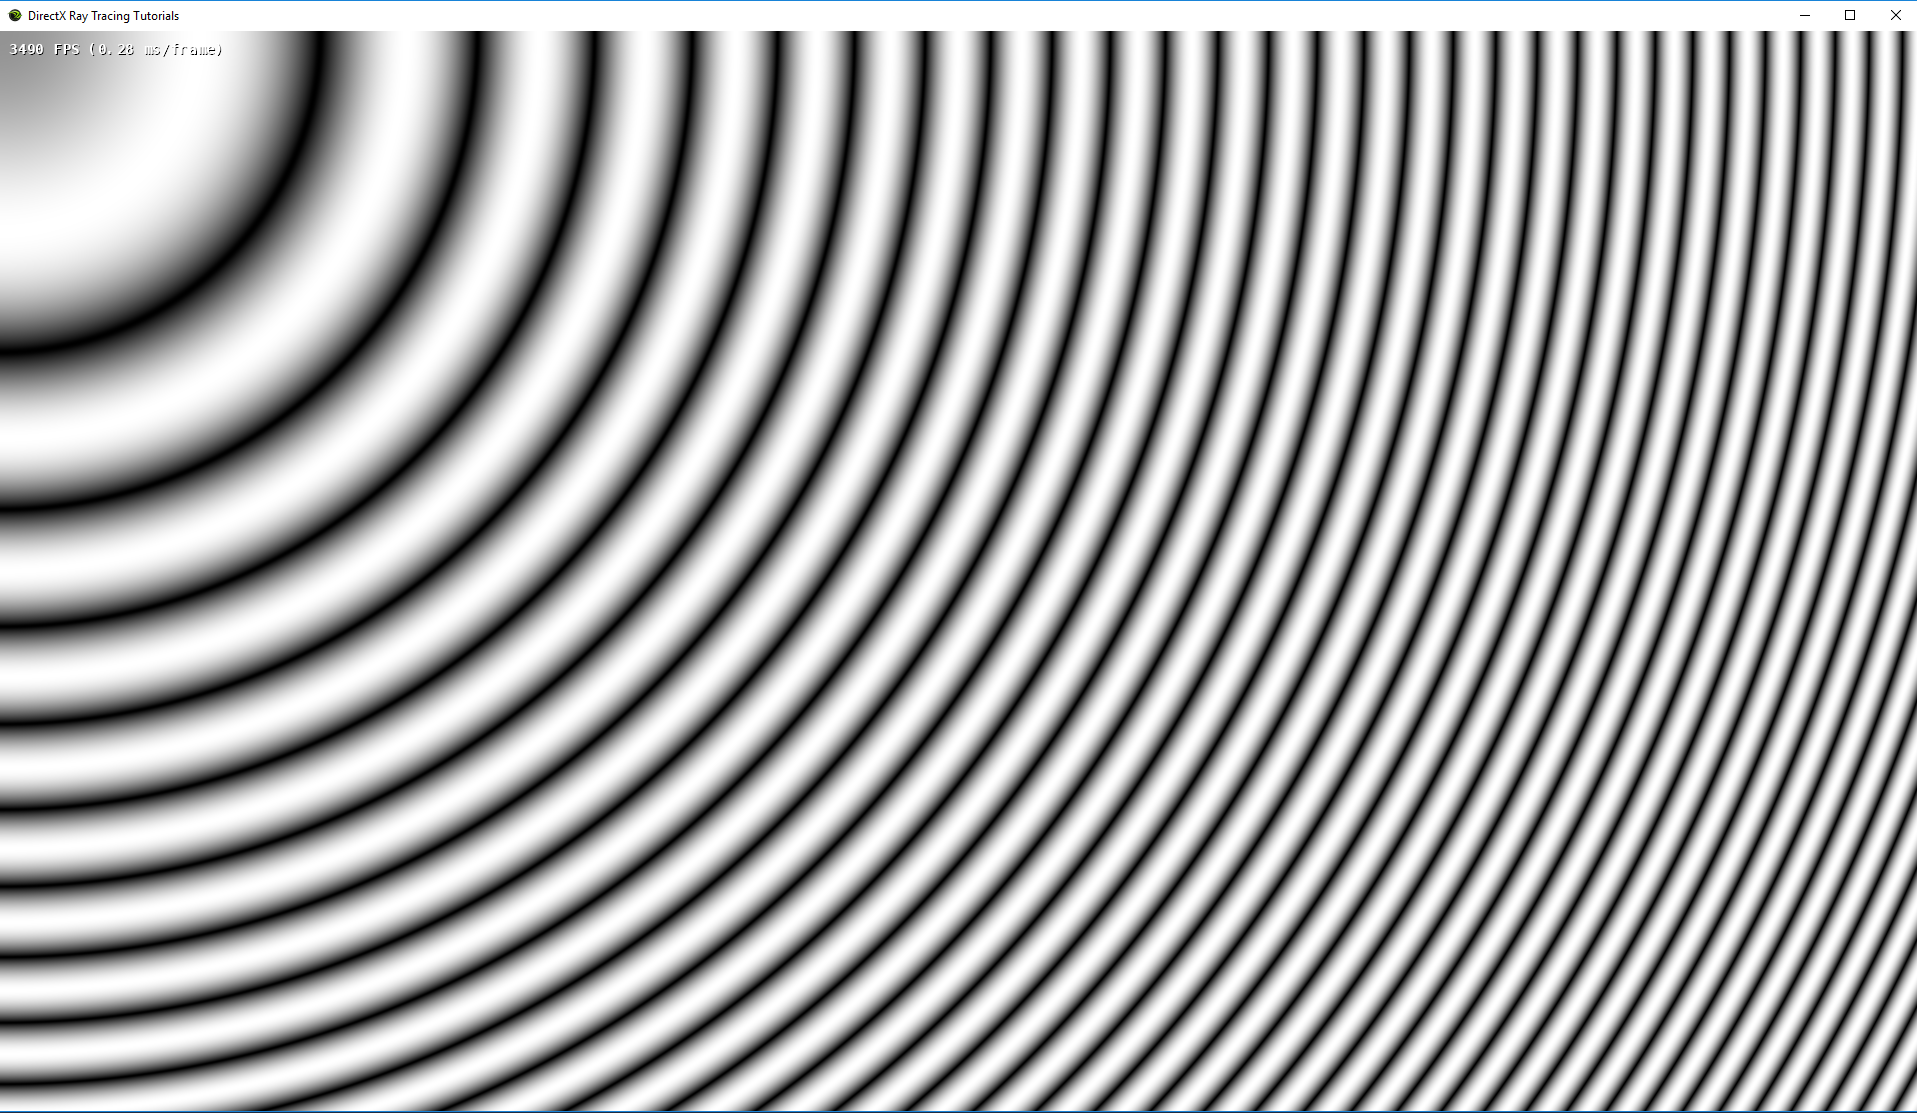
Hopefully, this tutorial demonstrated how to use a very basic raster shader and send it parameters
from our simple RenderPass architecture.
When you are ready, continue on to [Tutorial 3](../Tutor3/tutorial03.md.html), where we use a
more traditional rasterization pass to generate a [G-Buffer](https://en.wikipedia.org/wiki/G-buffer#G)
and allow the user to selectively display different G-Buffer parameters.